
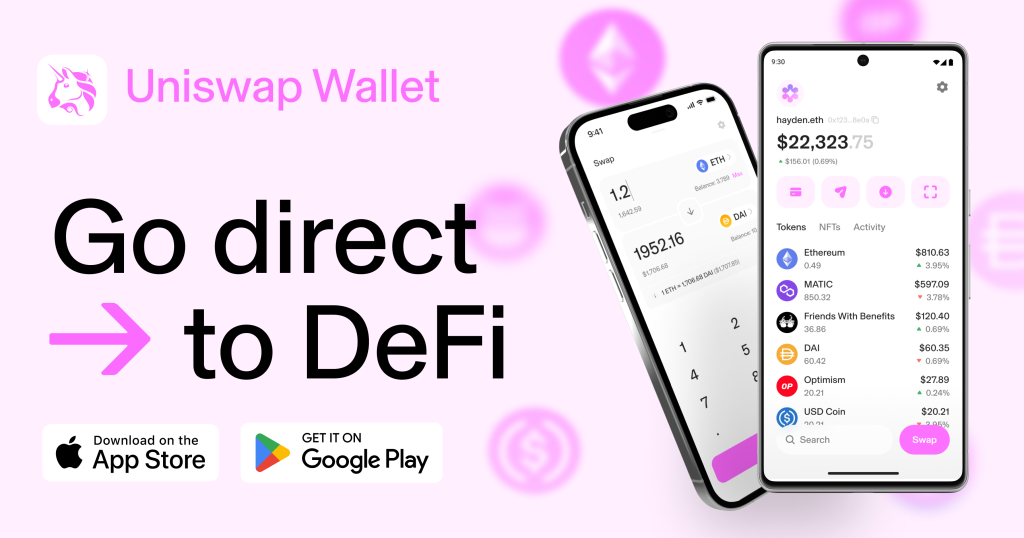
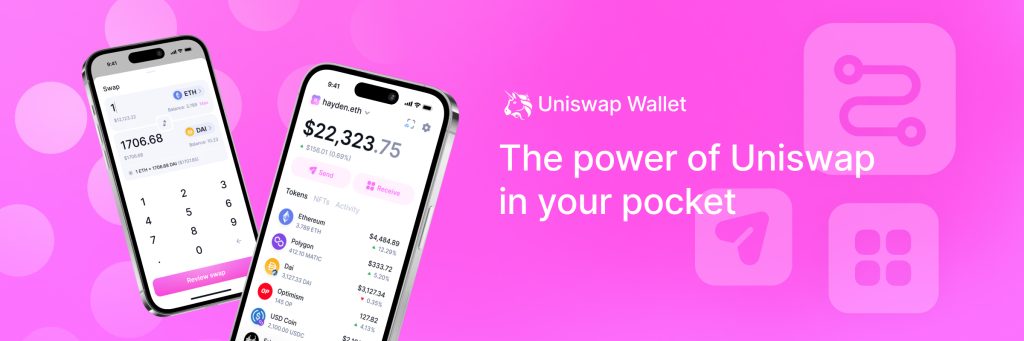
To set up Uniswap, connect a compatible wallet like MetaMask to the Uniswap website and start trading.
Installing a Compatible Wallet
To use Uniswap, you need a compatible wallet that can securely manage your crypto assets and interact with decentralized applications. Two popular options are MetaMask and Trust Wallet.
MetaMask Installation
MetaMask is a widely-used Ethereum wallet available as a browser extension and mobile app. It allows users to interact with Ethereum-based dApps, including Uniswap.
Downloading MetaMask
- Official Website: Visit the official MetaMask website at metamask.io to download the extension.
- Browser Compatibility: MetaMask supports Chrome, Firefox, Brave, and Edge browsers. Select your browser and follow the link to the appropriate extension store.
- Add Extension: Click “Add to [Browser]” and then “Add Extension” in the pop-up window to install MetaMask. The MetaMask icon will appear in your browser’s toolbar once installed.
Setting Up MetaMask
- Create a Wallet: Click on the MetaMask icon in your browser’s toolbar and select “Get Started.” Choose “Create a Wallet” if you don’t have an existing MetaMask account.
- Set a Password: Create a strong password for your wallet. This password will be used to unlock MetaMask on your device.
- Backup Seed Phrase: MetaMask will generate a 12-word seed phrase. Write this phrase down and store it securely. This phrase is crucial for recovering your wallet if you lose access.
- Confirm Seed Phrase: Verify your seed phrase by selecting the words in the correct order as prompted by MetaMask.
- Complete Setup: Once confirmed, your MetaMask wallet is set up and ready to use. You can now connect it to Uniswap and start trading.
Trust Wallet Setup
Trust Wallet is another popular mobile wallet that supports a wide range of cryptocurrencies and provides easy access to decentralized applications like Uniswap.
Downloading Trust Wallet
- App Store: Trust Wallet is available for both iOS and Android devices. Download it from the Apple App Store or Google Play Store by searching for “Trust Wallet.”
- Install App: Tap “Install” to download and install the Trust Wallet app on your mobile device.
Setting Up Trust Wallet
- Create a New Wallet: Open the Trust Wallet app and select “Create a new wallet.” Follow the prompts to set up your wallet.
- Backup Seed Phrase: Trust Wallet will provide a 12-word seed phrase. Write this down and store it securely. This seed phrase is essential for wallet recovery.
- Confirm Seed Phrase: Verify your seed phrase by selecting the words in the correct order as prompted by the app.
- Secure Your Wallet: Set a strong password or enable biometric authentication for additional security.
- Wallet Ready: Once setup is complete, your Trust Wallet is ready to use. You can now connect it to Uniswap via the built-in dApp browser.
Creating and Securing Your Wallet
Creating and securing your wallet is a crucial step in managing your crypto assets. Ensuring that your wallet is properly set up and secure will protect your funds from unauthorized access and loss.
Generating a Seed Phrase
A seed phrase, also known as a recovery phrase, is a set of words generated by your wallet that allows you to recover your funds if you lose access to your wallet. It is essential to handle your seed phrase with the utmost care.
What is a Seed Phrase?
- Definition: A seed phrase is a randomly generated series of 12, 18, or 24 words that can be used to restore access to your wallet and funds.
- Importance: Your seed phrase is the key to your wallet. Anyone with access to it can control your funds, so it must be kept secure and private.
How to Generate a Seed Phrase
- Wallet Setup: During the wallet setup process, the wallet software will generate a seed phrase for you. This happens when you create a new wallet using apps like MetaMask or Trust Wallet.
- Write Down Securely: Write down the seed phrase exactly as it appears. Do not store it digitally or share it with anyone. Use a pen and paper to record it and store it in a safe place.
Securing Your Seed Phrase
- Physical Security: Store the written seed phrase in a secure location, such as a safe or a locked drawer. Consider making multiple copies and storing them in different locations.
- Avoid Digital Storage: Do not store your seed phrase on digital devices or online storage services, as they are susceptible to hacking and unauthorized access.
Setting a Strong Password
A strong password is essential for protecting your wallet from unauthorized access. It adds an extra layer of security to your wallet.
Characteristics of a Strong Password
- Length: Aim for a password that is at least 12 characters long.
- Complexity: Use a combination of uppercase and lowercase letters, numbers, and special characters.
- Uniqueness: Ensure that your password is unique and not used for any other accounts or services.
Creating a Strong Password
- Password Generators: Use a reputable password generator to create a strong and unique password. Many online tools and password managers offer this feature.
- Avoid Common Phrases: Do not use easily guessable information such as names, birthdays, or common words.
Managing Your Password
- Password Manager: Use a password manager to securely store and manage your passwords. This reduces the risk of forgetting your password and provides easy access when needed.
- Regular Updates: Periodically update your password to ensure continued security.
Connecting Your Wallet to Uniswap
To use Uniswap, you need to connect your wallet to the platform. This can be done through a web browser or by using WalletConnect for mobile wallets. Here’s how you can connect your wallet to Uniswap.
Accessing Uniswap via Browser
Connecting your wallet to Uniswap through a browser is a straightforward process, particularly if you are using a browser extension wallet like MetaMask.
Steps to Access Uniswap via Browser
- Open Browser: Open your preferred web browser where you have your wallet extension installed (e.g., Chrome, Firefox, Brave).
- Visit Uniswap: Go to the official Uniswap website at uniswap.org.
- Launch App: Click on “Launch App” to open the Uniswap trading interface. This will take you to app.uniswap.org.
- Connect Wallet: In the top right corner of the Uniswap interface, click on “Connect Wallet.”
- Select Wallet Type: Choose the wallet you are using. For example, select “MetaMask” if you are using the MetaMask extension.
- Authorize Connection: A pop-up from your wallet extension will appear, asking you to authorize the connection. Click “Next” and then “Connect” to link your wallet to Uniswap.
- Confirmation: Once connected, your wallet address will be displayed in the top right corner of the Uniswap interface, indicating a successful connection.
Using WalletConnect for Mobile Wallets
WalletConnect is a protocol that allows you to connect mobile wallets to decentralized applications like Uniswap through a QR code scan.
Steps to Use WalletConnect
- Open Uniswap: On your desktop browser, go to the Uniswap website (uniswap.org) and click “Launch App.”
- Connect Wallet: In the Uniswap interface, click on “Connect Wallet” in the top right corner.
- Select WalletConnect: From the list of wallet options, choose “WalletConnect.”
- QR Code: A QR code will appear on the screen.
- Open Mobile Wallet: Open your mobile wallet app that supports WalletConnect (e.g., Trust Wallet, MetaMask Mobile).
- Scan QR Code: In your mobile wallet app, find the option to connect using WalletConnect. This is usually under settings or a dedicated WalletConnect menu. Use the app to scan the QR code displayed on your desktop browser.
- Authorize Connection: After scanning the QR code, your mobile wallet will prompt you to authorize the connection. Approve the connection in your mobile wallet app.
- Confirmation: Your mobile wallet is now connected to Uniswap. You can see your wallet address in the top right corner of the Uniswap interface on your desktop.
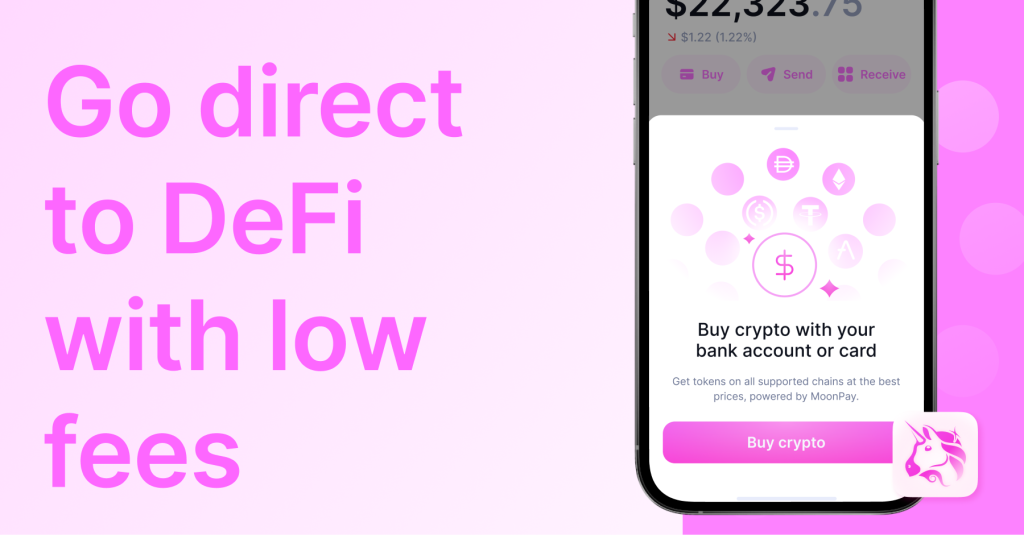
Adding Funds to Your Wallet
To use Uniswap, you need to have Ethereum (ETH) in your wallet. This involves buying Ethereum from an exchange and transferring it to your wallet. Here’s a step-by-step guide on how to do this.
Buying Ethereum (ETH)
Buying Ethereum is the first step to adding funds to your wallet. You can purchase ETH from various cryptocurrency exchanges.
Choosing an Exchange
- Popular Exchanges: Some of the popular exchanges where you can buy Ethereum include Coinbase, Binance, Kraken, and Gemini.
- Account Setup: Sign up for an account on your chosen exchange. Complete any required identity verification steps to comply with regulatory requirements.
Buying ETH
- Deposit Funds: Deposit funds into your exchange account. This can usually be done via bank transfer, credit card, or other payment methods supported by the exchange.
- Navigate to ETH Purchase: Go to the trading section of the exchange and select Ethereum (ETH). Choose the currency you are using to buy ETH (e.g., USD, EUR).
- Place Order: Enter the amount of ETH you want to buy and place your order. You can choose between different order types, such as market orders (buy at the current market price) or limit orders (buy at a specified price).
Confirming Purchase
- Order Confirmation: Once your order is placed, it may take a few minutes for the transaction to complete. Check your exchange account balance to ensure the ETH has been credited.
Transferring ETH to Your Wallet
After buying Ethereum on an exchange, you need to transfer it to your wallet to use it on Uniswap.
Getting Your Wallet Address
- Open Wallet: Open your wallet (e.g., MetaMask or Trust Wallet).
- Copy Address: Copy your wallet’s Ethereum address. This is usually displayed at the top of the wallet interface and starts with “0x.”
Transferring ETH
- Go to Exchange: Log in to your exchange account where you bought the ETH.
- Navigate to Withdraw: Find the “Withdraw” or “Send” option on the exchange.
- Enter Wallet Address: Paste your wallet address into the recipient field.
- Enter Amount: Enter the amount of ETH you want to transfer. Be aware of any minimum withdrawal limits and fees imposed by the exchange.
- Confirm Details: Double-check the wallet address and the amount to ensure accuracy. Incorrect details can result in loss of funds.
Completing the Transfer
- Submit Transaction: Submit the withdrawal request. The exchange may prompt you to confirm the transaction through email or SMS for security purposes.
- Transaction Time: The transfer might take a few minutes to process, depending on the Ethereum network’s congestion.
- Verify Receipt: Check your wallet to ensure the ETH has been received. You should see the updated balance in your wallet’s interface.
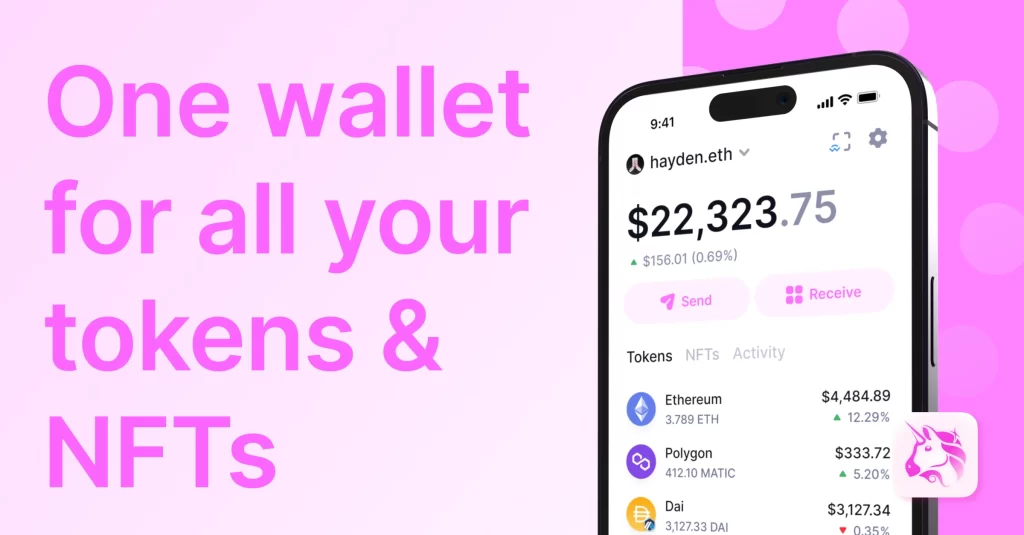
Navigating the Uniswap Interface
Once your wallet is connected and funded with Ethereum (ETH), you can begin using the Uniswap interface to trade and manage your assets. Here’s a guide to understanding the dashboard and exploring token swap options.
Understanding the Dashboard
The Uniswap dashboard is the main interface where you interact with the platform. It provides access to various features and tools for trading and managing your tokens.
Main Components of the Dashboard
- Navigation Bar: Located at the top, the navigation bar includes options to swap tokens, provide liquidity, and view your wallet’s connected status.
- Wallet Information: Your connected wallet’s address and balance are displayed in the top right corner. This section also provides a button to disconnect your wallet.
- Swap Interface: The central part of the dashboard is dedicated to the swap interface, where you can exchange one token for another.
- Liquidity Pools: Access the “Pool” section to view and manage liquidity pools. This is where you can add or remove liquidity to earn fees from trades.
- Market Data: Uniswap provides real-time data on token prices, liquidity, and trading volumes. This information is crucial for making informed trading decisions.
Using the Dashboard
- Connect Wallet: Ensure your wallet is connected. If not, click on “Connect Wallet” in the top right corner and follow the prompts to link your wallet.
- Switch Networks: If necessary, switch your network (e.g., between Ethereum mainnet and testnets) using your wallet’s interface.
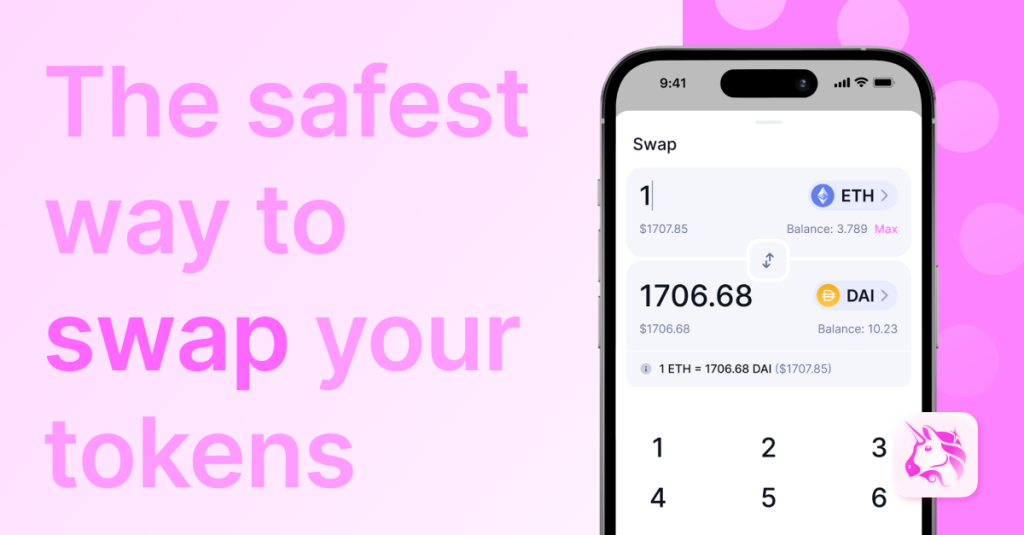
Exploring Token Swap Options
Swapping tokens is one of the primary functions of Uniswap. The swap interface allows you to exchange one Ethereum-based token for another quickly and efficiently.
Selecting Tokens to Swap
- From Token: In the “From” field, select the token you want to exchange. Click on the token name to open a dropdown menu of available tokens. You can also paste the token’s contract address if it’s not listed.
- To Token: In the “To” field, select the token you wish to receive. Similarly, use the dropdown menu or paste the token’s contract address.
Entering Trade Details
- Amount: Enter the amount of the “From” token you want to swap. The interface will automatically calculate the amount of the “To” token you will receive based on the current exchange rate.
- Slippage Tolerance: Set your slippage tolerance, which is the maximum acceptable difference between the expected and actual transaction price. This can be adjusted in the settings icon next to the “Swap” button.
- Transaction Deadline: Optionally, set a transaction deadline. This limits how long the swap will be valid, helping to protect against unfavorable price movements.
Reviewing and Confirming the Swap
- Review Details: Double-check all details of the swap, including the token amounts, slippage tolerance, and estimated gas fees.
- Approve Token: If it’s your first time swapping a particular token, you will need to approve it. Click “Approve [Token]” and confirm the approval in your wallet.
- Execute Swap: Click “Swap” to initiate the trade. A confirmation window will pop up summarizing the transaction details.
- Confirm in Wallet: Confirm the transaction in your wallet. This involves approving the gas fee and finalizing the swap.
- Transaction Confirmation: Once confirmed, the transaction will be processed on the Ethereum network. You can monitor its status in your wallet or using a blockchain explorer like Etherscan.
Executing Your First Trade
Executing your first trade on Uniswap involves selecting the tokens you want to swap and confirming the trade. Here’s a detailed guide on how to perform your first token swap on Uniswap.
Selecting Tokens to Swap
The first step in executing a trade is selecting the tokens you wish to swap.
Opening the Swap Interface
- Access Uniswap: Open your web browser and navigate to the Uniswap website (uniswap.org). Click “Launch App” to open the Uniswap interface.
- Connect Wallet: Ensure your wallet is connected. If not, click on “Connect Wallet” in the top right corner and select your wallet (e.g., MetaMask, Trust Wallet).
Choosing the Tokens
- From Token: In the “From” field, click on the dropdown menu to select the token you want to swap. You can either scroll through the list of available tokens or use the search bar to find the specific token.
- To Token: In the “To” field, click on the dropdown menu to select the token you want to receive. Again, use the list or search bar to find the token.
- Token Addresses: If the token you want to trade is not listed, you can manually add it by pasting its contract address into the search bar.
Entering the Amount
- Amount to Swap: Enter the amount of the “From” token you wish to swap. The interface will automatically calculate the amount of the “To” token you will receive based on the current exchange rate.
- Review Calculations: Check the displayed values for accuracy. The interface will show the exchange rate, price impact, and any applicable fees.
Confirming and Executing the Trade
Once you have selected the tokens and entered the amount, the next steps involve confirming and executing the trade.
Adjusting Trade Settings
- Slippage Tolerance: Click on the settings icon (usually a gear or cog) next to the “Swap” button to adjust the slippage tolerance. This setting helps protect against significant price changes during the transaction.
- Transaction Deadline: Set a transaction deadline if desired. This specifies how long the transaction is valid, helping to avoid long delays during network congestion.
Approving the Token (If Necessary)
- First-Time Approval: If this is your first time swapping a particular token, you will need to approve it. Click the “Approve [Token]” button.
- Wallet Confirmation: Your wallet will prompt you to confirm the approval. Review the transaction details and approve the token. This allows Uniswap to access the specified amount of the token for the swap.
Executing the Swap
- Initiate Swap: Click the “Swap” button to start the transaction.
- Review Swap Details: A confirmation window will appear with the details of the trade, including the amount of tokens being swapped, the expected amount to receive, and the gas fees.
- Confirm in Wallet: Confirm the transaction in your wallet. Your wallet will display a pop-up with the transaction details and gas fees. Approve the transaction to proceed.
Monitoring the Transaction
- Transaction Status: After confirming the swap, the transaction will be processed on the Ethereum network. This can take a few minutes depending on network congestion.
- Blockchain Explorer: You can track the status of your transaction using a blockchain explorer like Etherscan. Copy the transaction ID from your wallet and paste it into the search bar on Etherscan to view the details.
Transaction Completion
- Confirmation: Once the transaction is confirmed, the tokens will appear in your wallet. The Uniswap interface will update to reflect the new token balances.
- Check Wallet: Open your wallet to verify that the swapped tokens have been received and the correct amounts are displayed.
Providing Liquidity on Uniswap
Providing liquidity on Uniswap allows you to earn a share of the trading fees generated by the platform. This guide will help you understand how to choose liquidity pools and add liquidity to start earning fees.
Choosing Liquidity Pools
Before providing liquidity, you need to select the appropriate liquidity pool. Each pool consists of a pair of tokens that traders can swap between.
Understanding Liquidity Pools
- Token Pairs: Liquidity pools on Uniswap are composed of pairs of tokens (e.g., ETH/USDC, DAI/USDT). Each pool facilitates swaps between these two tokens.
- Liquidity Provider Tokens (LP Tokens): When you add liquidity to a pool, you receive LP tokens representing your share of the pool. These tokens entitle you to a portion of the trading fees and can be redeemed for your share of the pool’s assets.
Factors to Consider
- Trading Volume: Pools with higher trading volumes generate more fees, potentially increasing your earnings as a liquidity provider. Popular pairs like ETH/USDC or DAI/USDT often have high volumes.
- Impermanent Loss: Providing liquidity can expose you to impermanent loss, which occurs when the value of your deposited tokens changes relative to holding them outside the pool. Consider this risk when choosing a pool.
- Pool Size: Larger pools tend to have lower price volatility and may be more stable, but smaller pools can offer higher fee rewards due to lower liquidity competition.
Researching Pools
- Uniswap Interface: Use the Uniswap interface to explore available liquidity pools. The “Pool” section provides data on each pool, including total liquidity, trading volume, and fees earned.
- Third-Party Tools: Tools like Uniswap Info or Dune Analytics offer detailed analytics on pool performance, helping you make informed decisions.
Adding Liquidity and Earning Fees
Once you’ve chosen a pool, you can add liquidity and start earning fees.
Adding Liquidity
- Access Uniswap: Open the Uniswap interface at uniswap.org and connect your wallet.
- Navigate to Pools: Click on the “Pool” tab in the top navigation bar and then select “Add Liquidity.”
- Select Token Pair: Choose the pair of tokens you want to add liquidity to. For example, if you want to provide liquidity to the ETH/USDC pool, select these tokens from the dropdown menus.
- Enter Amounts: Enter the amount of each token you want to deposit into the pool. The interface will automatically calculate the required amount of the second token based on the current exchange rate.
- Approve Tokens: If it’s your first time adding liquidity for these tokens, you will need to approve them. Click “Approve [Token]” and confirm the approval in your wallet.
- Confirm Deposit: After approving the tokens, click “Supply” to add liquidity. A confirmation window will appear with the details of your deposit, including the amounts of each token and your share of the pool.
- Confirm in Wallet: Confirm the transaction in your wallet to complete the deposit. Your wallet will prompt you to approve the gas fee and finalize the transaction.
Earning Fees
- Liquidity Provider Fees: Once you’ve added liquidity, you will start earning a portion of the 0.30% trading fees generated by the pool. These fees are distributed proportionally to all liquidity providers based on their share of the pool.
- Accumulating Earnings: Your earnings will accumulate in the form of additional LP tokens. You can view your LP token balance and accrued fees in the Uniswap interface under the “Pool” section.
Managing and Withdrawing Liquidity
- Monitor Performance: Regularly monitor the performance of your liquidity pool, including trading volume, fees earned, and any changes in the value of your deposited tokens.
- Withdraw Liquidity: To withdraw your liquidity, navigate to the “Pool” section and select “Remove Liquidity.” Choose the amount you want to withdraw, and confirm the transaction in your wallet. You will receive your share of the pool’s tokens along with any earned fees.