
To set up Uniswap, connect your Ethereum wallet (e.g., MetaMask) to Uniswap.org and start trading.
Creating a Cryptocurrency Wallet
Setting up a cryptocurrency wallet is the first step to using Uniswap. A wallet allows you to store, send, and receive Ethereum and other tokens, as well as interact with decentralized applications (dApps) like Uniswap.
Choosing a Wallet Provider
- MetaMask: One of the most popular Ethereum wallets, MetaMask is a browser extension that allows you to manage your funds and interact with dApps directly from your browser.
- Trust Wallet: A mobile wallet that supports a wide range of cryptocurrencies, Trust Wallet is known for its user-friendly interface and robust security features.
- Coinbase Wallet: Another popular choice, Coinbase Wallet offers a seamless experience for managing your crypto assets and accessing dApps.
- Hardware Wallets: For those who prioritize security, hardware wallets like Ledger and Trezor provide offline storage for your cryptocurrencies, protecting them from online threats.
Setting Up MetaMask
- Installing MetaMask: Visit the MetaMask website or your browser’s extension store to download and install the MetaMask extension. MetaMask is available for Chrome, Firefox, Brave, and Edge.
- Creating an Account: Once installed, open MetaMask and click on “Get Started.” Follow the prompts to create a new wallet. You’ll need to set a strong password and back up your seed phrase, which is crucial for recovering your wallet if you lose access.
- Backing Up Your Seed Phrase: MetaMask will generate a 12-word seed phrase during the setup process. Write down this phrase and store it in a safe place. Never share your seed phrase with anyone, as it provides access to your funds.
- Adding Funds: After setting up your wallet, you’ll need to add funds. You can buy Ethereum (ETH) directly through MetaMask using a credit card or transfer ETH from another wallet or exchange.
- Connecting to Uniswap: With your MetaMask wallet set up and funded, you can now connect it to Uniswap. Visit uniswap.org, click on “Launch App,” and select MetaMask from the list of wallet options. Follow the prompts to connect your wallet.
Adding Funds to Your Wallet
Adding funds to your cryptocurrency wallet is essential for participating in decentralized exchanges like Uniswap. The primary cryptocurrency you’ll need is Ethereum (ETH), as it is used for transactions and paying gas fees on the Ethereum network.
Buying Ethereum (ETH)
- Using Cryptocurrency Exchanges: The most common way to buy Ethereum is through cryptocurrency exchanges such as Coinbase, Binance, Kraken, or Bitfinex. These platforms allow you to purchase ETH using fiat currencies (USD, EUR, etc.).
- Creating an Account: Sign up for an account on your chosen exchange. You will need to complete the verification process, which typically involves providing identification documents.
- Depositing Funds: Once your account is verified, deposit funds into the exchange using your bank account, credit card, or other supported payment methods.
- Purchasing ETH: Navigate to the trading section of the exchange, select Ethereum (ETH), and enter the amount you wish to purchase. Confirm the transaction, and the ETH will be credited to your exchange account.
- Peer-to-Peer Platforms: Platforms like LocalBitcoins or Paxful allow you to buy ETH directly from other individuals. This method can offer more payment options but requires careful attention to security and reputation of sellers.
- Finding a Seller: Search for a reputable seller on the platform who offers a payment method you prefer.
- Completing the Transaction: Follow the platform’s instructions to complete the payment. The ETH will be held in escrow until the transaction is confirmed, after which it will be released to your wallet.
Transferring ETH to Your Wallet
- Copying Your Wallet Address: Open your cryptocurrency wallet (e.g., MetaMask) and copy your Ethereum wallet address. This is a long string of characters starting with ‘0x’.
- Initiating the Transfer: Go to the exchange or platform where you purchased your ETH and navigate to the withdrawal section.
- Entering Your Wallet Address: Paste your wallet address into the recipient field. Double-check to ensure it is correct, as sending ETH to the wrong address can result in permanent loss of funds.
- Choosing the Amount: Enter the amount of ETH you want to transfer to your wallet. Be mindful of any withdrawal fees the exchange might charge.
- Confirming the Transfer: Confirm the details and initiate the transfer. The ETH should appear in your wallet after the transaction is processed on the Ethereum network, which usually takes a few minutes.
- Verification: Once the transaction is complete, check your wallet to ensure the funds have arrived. You can view the transaction details on an Ethereum blockchain explorer like Etherscan by entering your wallet address or transaction ID.
Accessing the Uniswap Interface
Accessing Uniswap’s interface is straightforward and user-friendly. Once you have your Ethereum wallet set up and funded, you can easily connect to Uniswap to start trading.
Navigating to Uniswap.org
- Opening Your Browser: Launch your preferred web browser (Chrome, Firefox, Brave, etc.).
- Entering the URL: Type “uniswap.org” into the address bar and press Enter. This will take you to the official Uniswap website.
- Launching the App: On the Uniswap homepage, click on the “Launch App” button. This will redirect you to the Uniswap interface where you can perform swaps and manage your assets.
Connecting Your Wallet
- Selecting a Wallet: Once you are on the Uniswap interface, you will see a “Connect Wallet” button at the top right corner. Click on this button to begin the wallet connection process.
- Choosing MetaMask: A list of compatible wallets will appear. Select MetaMask (or the wallet you are using) from the list. If you haven’t already, ensure your wallet extension or app is installed and active.
- Granting Permissions: A pop-up will appear from your wallet extension asking for permission to connect to Uniswap. Review the details and click “Connect” to allow Uniswap to interact with your wallet.
- Confirming Connection: Once connected, you will see your wallet address displayed at the top right corner of the Uniswap interface. This confirms that your wallet is successfully connected and ready to use.
Swapping Tokens on Uniswap
Swapping tokens on Uniswap is a simple and efficient process. Here’s how you can perform a token swap on the platform.
Selecting Tokens to Swap
- Access the Swap Interface: Once your wallet is connected to Uniswap, you will be directed to the main swap interface. Here, you can select the tokens you wish to trade.
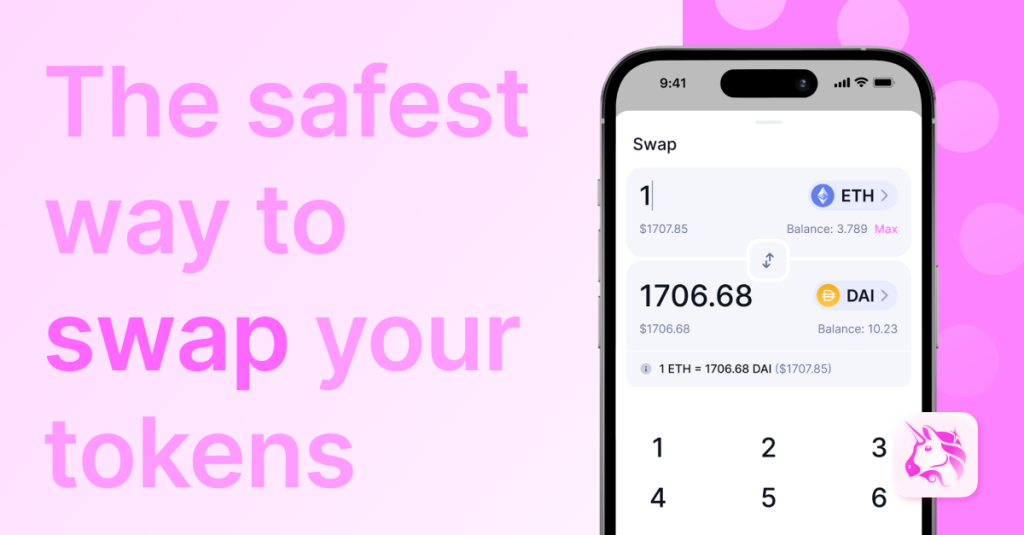
- Choosing the Token to Swap From: In the first dropdown menu labeled “From,” select the token you currently hold that you want to swap. For example, choose “ETH” if you are swapping Ethereum for another token.
- Entering the Amount: Enter the amount of the selected token you wish to swap. The interface will automatically calculate the equivalent amount of the token you will receive.
- Choosing the Token to Swap To: In the second dropdown menu labeled “To,” select the token you wish to receive. Uniswap supports a wide range of ERC-20 tokens, so you can choose from a variety of options.
- Reviewing the Exchange Rate: Uniswap will display the current exchange rate, including any associated fees and price impact. Review these details to ensure they meet your expectations.
Confirming the Transaction
- Initiating the Swap: Once you have selected your tokens and entered the desired amount, click the “Swap” button. A transaction summary will appear, detailing the tokens, amounts, fees, and estimated gas cost.
- Reviewing Transaction Details: Carefully review all transaction details in the summary. Ensure that the amounts and tokens are correct and that you are comfortable with the gas fees and slippage tolerance.
- Confirming in Your Wallet: After confirming the details on Uniswap, your wallet extension (e.g., MetaMask) will prompt you to approve the transaction. Review the transaction information one more time and click “Confirm” in your wallet.
- Transaction Processing: The transaction will be submitted to the Ethereum network. You can monitor its progress in real-time within your wallet or on a blockchain explorer like Etherscan.
- Receiving Tokens: Once the transaction is confirmed, the swapped tokens will be deposited into your wallet. This process can take a few minutes depending on network congestion.
Providing Liquidity on Uniswap
Providing liquidity on Uniswap allows you to earn fees by supplying your assets to the platform’s liquidity pools. Here’s a detailed guide on how to understand and add liquidity to Uniswap.
Understanding Liquidity Pools
- What Are Liquidity Pools?: Liquidity pools are collections of funds locked in a smart contract. They facilitate decentralized trading by providing the liquidity needed for users to swap tokens.
- Automated Market Maker (AMM): Uniswap uses an AMM model, where liquidity providers (LPs) supply pairs of tokens to the pool, and the price of tokens is determined algorithmically based on supply and demand.
- Earning Fees: LPs earn a portion of the transaction fees generated by swaps in their pool. On Uniswap, a 0.3% fee is charged on each trade, which is distributed to all LPs in proportion to their share of the pool.
- Impermanent Loss: LPs should be aware of impermanent loss, which occurs when the value of tokens in the pool changes relative to when they were deposited. This can lead to potential losses compared to simply holding the tokens.
Adding Liquidity
- Access the Liquidity Interface: On the Uniswap interface, click on the “Pool” tab at the top. Then, click the “Add Liquidity” button to start the process.
- Selecting Token Pairs: Choose the pair of tokens you want to provide as liquidity. For example, you can provide liquidity for the ETH/DAI pool. You need to supply an equivalent value of both tokens.
- Entering Amounts: Enter the amount of one of the tokens you wish to add. The interface will automatically calculate the required amount of the second token to match the value.
- Reviewing Pool Share: The interface will display your share of the pool based on the amount of tokens you are providing. Review these details to ensure you are satisfied with your contribution.
- Approving Tokens: Before adding liquidity, you need to approve the tokens for use by Uniswap. Click the “Approve” button next to each token, and confirm the approval transaction in your wallet (e.g., MetaMask).
- Adding Liquidity: After the approvals are complete, click the “Supply” button to add your tokens to the liquidity pool. A summary of the transaction will appear, detailing the tokens, amounts, and your pool share.
- Confirming in Your Wallet: Confirm the liquidity addition transaction in your wallet. Review the details and approve the transaction to finalize adding liquidity.
- Transaction Processing: The transaction will be submitted to the Ethereum network. Once confirmed, your tokens will be added to the liquidity pool, and you will receive liquidity provider (LP) tokens representing your share.
- Earning Fees: As an LP, you will start earning a share of the trading fees generated in the pool. You can track your earnings and liquidity position within the “Pool” tab on Uniswap.
Managing Your Uniswap Transactions
Effective management of your Uniswap transactions is crucial for tracking your trading activities and ensuring the security of your funds. Here’s how you can view your transaction history and withdraw funds.
Viewing Transaction History
- Accessing Your Wallet: Open your Ethereum wallet (e.g., MetaMask) that you connected to Uniswap.
- Checking Activity Tab: In MetaMask, navigate to the “Activity” tab. This tab displays a chronological list of all transactions associated with your wallet, including swaps, liquidity additions, and withdrawals.
- Using Etherscan: For a more detailed view, you can use a blockchain explorer like Etherscan. Go to etherscan.io and enter your wallet address in the search bar. Etherscan will display all transactions linked to your address.
- Filtering Transactions: You can filter transactions to view specific types, such as token transfers, contract interactions (e.g., Uniswap trades), and ETH transactions.
- Viewing Details: Click on individual transactions to see detailed information, including timestamps, transaction hashes, gas fees, and status (pending, confirmed, or failed).
Withdrawing Funds
- Accessing the Pool Interface: If you’ve provided liquidity on Uniswap, go to the “Pool” tab on the Uniswap interface.
- Selecting Your Position: Locate the liquidity pool position you wish to withdraw from. Click on it to open detailed options.
- Removing Liquidity: Click the “Remove” button to start the withdrawal process.
- Adjusting Withdrawal Amount: Use the slider or enter the amount of liquidity you want to remove. You can choose to withdraw partially or fully from the pool.
- Reviewing Pool Share: The interface will show the amount of each token you will receive based on your pool share.
- Approving Transaction: After setting the desired amount, click the “Approve” button and confirm the transaction in your wallet to allow Uniswap to access your LP tokens.
- Confirming the Withdrawal: Once approved, click “Remove” to finalize the withdrawal. A summary will appear showing the tokens and amounts you will receive.
- Confirming in Your Wallet: Your wallet will prompt you to confirm the withdrawal transaction. Review the details and approve the transaction.
- Transaction Processing: The transaction will be submitted to the Ethereum network. Once confirmed, your tokens will be returned to your wallet, and your LP tokens will be burned, reflecting the removal of liquidity.
- Verifying Withdrawal: Check your wallet balance and transaction history to verify that the tokens have been successfully withdrawn and credited to your account.
Ensuring Security and Best Practices
Ensuring the security of your assets and following best practices is crucial when using decentralized exchanges like Uniswap. Here are key steps to secure your wallet and avoid common scams.
Securing Your Wallet
- Use Reputable Wallets: Choose well-known and reputable wallets such as MetaMask, Trust Wallet, or hardware wallets like Ledger and Trezor. These wallets have strong security measures in place.
- Enable Two-Factor Authentication (2FA): If your wallet or associated services offer 2FA, enable it to add an extra layer of security. This helps protect against unauthorized access.
- Secure Private Keys and Seed Phrases: Never share your private keys or seed phrases with anyone. Store them in a safe and secure location, such as a hardware wallet or a physically secure location. Consider using a password manager for digital storage.
- Use Strong, Unique Passwords: Create strong, unique passwords for your wallet and related accounts. Avoid reusing passwords across multiple sites.
- Keep Software Updated: Regularly update your wallet software and any related applications to ensure you have the latest security patches and features.
- Disconnect When Not in Use: Disconnect your wallet from dApps and websites when not in use. This minimizes the risk of unauthorized transactions.
Avoiding Common Scams
- Beware of Phishing Attacks: Phishing attacks often involve fake websites or emails that appear legitimate. Always double-check URLs and ensure you are on the official Uniswap site (uniswap.org). Bookmark the site to avoid entering incorrect URLs.
- Verify Communication Channels: Uniswap and other legitimate services will never ask for your private keys or personal information through email or social media. Be skeptical of unsolicited messages and verify their authenticity through official channels.
- Use Secure Connections: Ensure that you are using a secure (HTTPS) connection when accessing Uniswap and other financial services. Look for the padlock icon in the browser’s address bar.
- Avoid Unsolicited Requests: Be cautious of unsolicited requests for information or transactions. Scammers often impersonate support staff or community members. Verify any requests through official channels.
- Double-Check Transactions: Before confirming any transaction, double-check the details, including the recipient address and amount. Mistakes can be costly and irreversible.
- Stay Informed: Educate yourself about the latest scams and security threats in the crypto space. Join reputable communities and follow trusted sources for updates and advice.
- Use Hardware Wallets for Large Holdings: For significant amounts of cryptocurrency, consider using a hardware wallet. These devices store your private keys offline, making them less susceptible to online threats.