
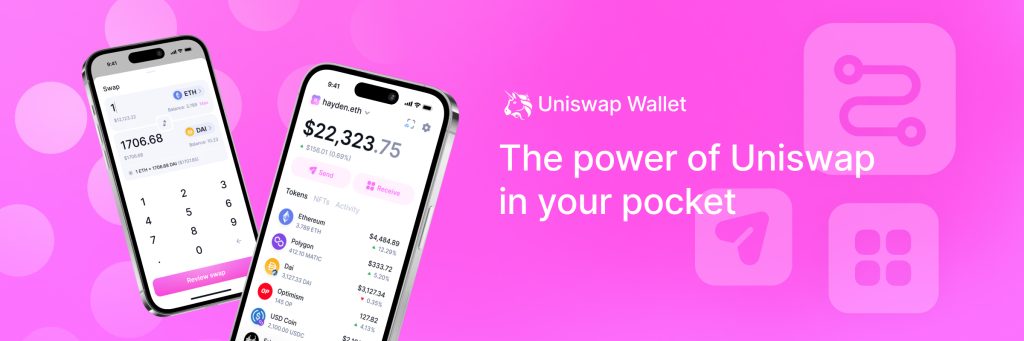
To get Uniswap, visit the Uniswap website, connect your crypto wallet, and start trading ERC-20 tokens.
Understanding Uniswap
Uniswap is a decentralized exchange (DEX) protocol built on the Ethereum blockchain, allowing users to trade ERC-20 tokens directly from their wallets. Unlike traditional exchanges, Uniswap does not rely on a centralized order book; instead, it uses an automated market-making (AMM) system.
What is Uniswap?
Uniswap is a decentralized finance (DeFi) protocol that facilitates automated trading of Ethereum-based tokens. It was created to provide liquidity directly through smart contracts rather than relying on a centralized intermediary.
- Decentralized Exchange: Uniswap allows users to trade cryptocurrencies directly from their wallets without the need for a middleman.
- ERC-20 Tokens: The platform supports all tokens built on the Ethereum blockchain, making it versatile and widely used.
- Open-Source: Uniswap’s code is publicly available, allowing for transparency and continuous improvement by the community.
How Uniswap Works
Uniswap operates on an automated market maker (AMM) system, which means it uses liquidity pools instead of order books to facilitate trades. This system is innovative and differs significantly from traditional exchange models.
- Liquidity Pools: Users can provide liquidity to pools by depositing an equivalent value of two tokens. In return, they receive liquidity provider (LP) tokens, which can earn them fees from trades.
- Constant Product Formula: Uniswap uses the formula x * y = k to ensure that the product of the quantities of the two tokens remains constant, balancing the pool.
- Trading: When a trade is made, the smart contract adjusts the pool balances and recalculates prices based on the new ratio of tokens in the pool.
- Fees: Uniswap charges a small fee on trades, which is distributed to liquidity providers, incentivizing them to supply liquidity.
Setting Up a Crypto Wallet
To get started with Uniswap, you need a crypto wallet that supports Ethereum and ERC-20 tokens. This wallet will allow you to store, send, and receive cryptocurrencies, as well as interact with decentralized applications (dApps) like Uniswap.
Choosing the Right Wallet
Choosing the right wallet is crucial for ensuring the security and usability of your crypto assets. Here are some popular options:
- MetaMask: A widely used browser extension and mobile wallet that supports Ethereum and ERC-20 tokens. It is user-friendly and integrates seamlessly with Uniswap.
- Trust Wallet: A mobile wallet that supports a wide range of cryptocurrencies, including Ethereum and ERC-20 tokens. It offers a simple interface and high security.
- Coinbase Wallet: A mobile wallet by Coinbase that allows you to store your crypto assets securely and interact with dApps. It is suitable for beginners due to its ease of use.
Installing Your Wallet
Once you’ve chosen a wallet, the next step is to install it on your device. Here’s a step-by-step guide for MetaMask, one of the most popular options:
- Download MetaMask: Visit the official MetaMask website or your device’s app store and download the extension or app.
- Set Up Your Account: Open MetaMask and follow the prompts to create a new wallet. You’ll need to create a strong password and securely store your seed phrase. The seed phrase is crucial for recovering your wallet if you lose access.
- Add Ethereum: After setting up your wallet, you’ll need to add Ethereum (ETH) to it. You can purchase ETH from a cryptocurrency exchange like Coinbase, Binance, or Kraken and transfer it to your MetaMask wallet address.
Funding Your Wallet
Before you can start using Uniswap, you need to fund your wallet with Ethereum (ETH). ETH is necessary to pay for transaction fees on the Ethereum network and to trade tokens on Uniswap.
Buying Ethereum (ETH)
Buying Ethereum is a straightforward process that involves using a cryptocurrency exchange. Here are the steps:
- Choose an Exchange: Select a reputable cryptocurrency exchange such as Coinbase, Binance, Kraken, or Gemini. Ensure the exchange supports your local currency and has a good reputation for security.
- Create an Account: Sign up for an account on the exchange. This typically involves providing some personal information and verifying your identity.
- Add a Payment Method: Link your bank account, credit card, or other payment methods to your exchange account. Different exchanges offer various payment options, so choose the one that suits you best.
- Buy Ethereum: Navigate to the buying section of the exchange, select Ethereum (ETH), and enter the amount you wish to purchase. Confirm the transaction to complete your purchase. The ETH will be added to your exchange wallet.
Transferring ETH to Your Wallet
Once you have purchased Ethereum on an exchange, you need to transfer it to your personal wallet to use it on Uniswap. Follow these steps:
- Get Your Wallet Address: Open your crypto wallet (e.g., MetaMask) and copy your Ethereum wallet address. This is a long string of characters that uniquely identifies your wallet on the Ethereum network.
- Initiate the Transfer: Go back to your exchange account, find the withdraw section, and select Ethereum (ETH). Paste your wallet address into the recipient field and enter the amount of ETH you want to transfer.
- Confirm the Transfer: Double-check the wallet address to ensure it is correct. Any mistakes could result in the loss of your funds. Once verified, confirm the withdrawal. The exchange will process the transaction, which may take a few minutes to complete.
- Verify the Transfer: Open your crypto wallet and check your balance to confirm that the ETH has arrived. You might need to wait for the transaction to be confirmed on the Ethereum network.
Connecting Your Wallet to Uniswap
To start trading on Uniswap, you need to connect your crypto wallet to the Uniswap platform. This process is straightforward and ensures that you can interact with the decentralized exchange seamlessly.
Accessing Uniswap
Accessing the Uniswap platform involves a few simple steps:
- Open a Browser: Use a web browser that supports your crypto wallet extension, such as Chrome or Firefox if you are using MetaMask.
- Navigate to Uniswap: Visit the official Uniswap website by typing “uniswap.org” in your browser’s address bar. Ensure you are on the correct site to avoid phishing scams.
- Launch the App: On the Uniswap homepage, click on the “Launch App” button. This will redirect you to the Uniswap interface where you can start trading.
Linking Your Wallet
Once you are on the Uniswap interface, you need to link your wallet to begin trading. Here’s how:
- Connect Wallet: In the top right corner of the Uniswap interface, click on the “Connect Wallet” button. A pop-up window will appear with several wallet options.
- Select Your Wallet: Choose the wallet you are using (e.g., MetaMask, Trust Wallet, Coinbase Wallet). Click on the respective option.
- Authorize Connection: If you are using a browser extension like MetaMask, a new window will pop up asking you to authorize the connection. Click on “Connect” to allow Uniswap to access your wallet.
- Confirm Connection: Your wallet address will appear in the top right corner of the Uniswap interface, indicating that your wallet is successfully connected.
Making Your First Trade on Uniswap
Trading on Uniswap is a simple process that involves selecting the tokens you want to trade and executing the trade. Here’s a step-by-step guide to help you make your first trade on Uniswap.
Selecting Tokens
Before you can execute a trade, you need to choose the tokens you want to trade. Uniswap supports a wide range of Ethereum-based tokens.
- Open the Uniswap Interface: Ensure you are on the Uniswap trading interface with your wallet connected.
- Select the Token You Want to Trade: Click on the “Swap” tab. In the “From” field, select the token you want to trade from the dropdown list. If it’s ETH, it will be selected by default. You can also search for the token by name or by pasting its contract address.
- Choose the Token You Want to Receive: In the “To” field, select the token you want to receive. Again, you can choose from the dropdown list or search by name or contract address.
Executing the Trade
Once you have selected the tokens, you can proceed with executing the trade.
- Enter the Amount: Enter the amount of the token you want to trade in the “From” field. The corresponding amount of the token you will receive will be automatically calculated and displayed in the “To” field.
- Review the Trade Details: Check the details of the trade, including the exchange rate, slippage tolerance, and the estimated network fee (gas fee). Make sure everything looks correct before proceeding.
- Approve the Token: If you are trading a token other than ETH, you will need to approve it first. Click on the “Approve” button next to the “From” field. Your wallet will prompt you to confirm the approval. This step is necessary for Uniswap to interact with the token.
- Confirm the Trade: After approving the token, click on the “Swap” button. A confirmation window will appear with the details of the trade. Review these details and click on “Confirm Swap.”
- Confirm in Your Wallet: Your wallet will prompt you to confirm the transaction and pay the gas fee. Review the transaction details and confirm the transaction.
- Wait for Confirmation: The transaction will be submitted to the Ethereum network. You can track its progress in your wallet or on a blockchain explorer like Etherscan. Once confirmed, the tokens will appear in your wallet.
Managing and Securing Your Assets
Proper management and security of your crypto assets are essential when using Uniswap and other DeFi platforms. This involves understanding transaction fees and ensuring the highest level of security for your holdings.
Understanding Gas Fees
Gas fees are transaction fees paid to miners on the Ethereum network to process transactions. These fees can vary based on network congestion and the complexity of the transaction.
- What are Gas Fees?: Gas fees are measured in gwei, a small fraction of ETH. They compensate miners for the computational effort required to process and validate transactions.
- Factors Influencing Gas Fees: Network congestion, the complexity of the transaction, and the speed at which you want the transaction to be processed can affect gas fees. Higher fees result in faster transaction processing.
- Estimating Gas Fees: Use tools like ETH Gas Station or the gas fee estimator within your wallet to get an idea of the current gas prices. This helps you decide the optimal time to execute transactions.
- Adjusting Gas Fees: Most wallets allow you to set a custom gas fee. If you’re not in a hurry, you can set a lower gas fee to save costs, but this may delay your transaction.
Using Hardware Wallets
Hardware wallets provide an extra layer of security for your crypto assets by storing your private keys offline. They are considered one of the safest ways to manage your crypto holdings.
- What is a Hardware Wallet?: A hardware wallet is a physical device that securely stores your private keys offline. Popular hardware wallets include Ledger Nano S, Ledger Nano X, and Trezor.
- Benefits of Hardware Wallets: Hardware wallets offer enhanced security by keeping your private keys offline, protecting them from hacks and malware. They require physical confirmation for transactions, adding an extra layer of protection.
- Setting Up a Hardware Wallet: Follow the manufacturer’s instructions to set up your hardware wallet. This typically involves installing companion software, creating a new wallet, and securely storing your recovery seed phrase.
- Connecting to Uniswap: Most hardware wallets can be connected to Uniswap through compatible software wallets like MetaMask. To connect, open MetaMask, select “Connect Hardware Wallet,” and follow the prompts to link your device.
- Transacting with a Hardware Wallet: When making a transaction, you will be prompted to confirm the details on your hardware wallet. This physical confirmation ensures that only you can authorize transactions.
Exploring Advanced Features
Uniswap offers several advanced features that allow users to engage more deeply with the platform. These include providing liquidity to earn fees and participating in governance to influence the platform’s future.
Providing Liquidity
Providing liquidity on Uniswap involves depositing an equal value of two tokens into a liquidity pool. This process supports the decentralized exchange by ensuring there is enough liquidity for traders to execute swaps.
- What is Liquidity Provision?: Liquidity provision is the process of adding your tokens to a liquidity pool on Uniswap. In return, you receive Liquidity Provider (LP) tokens that represent your share of the pool.
- Benefits of Providing Liquidity: By providing liquidity, you earn a portion of the trading fees generated by the pool. These fees are distributed proportionally based on your share of the pool.
- Steps to Provide Liquidity:
- Select a Pool: Choose a pair of tokens you want to provide liquidity for. Popular pairs include ETH/USDT, ETH/DAI, and others.
- Add Tokens: Navigate to the “Pool” tab on Uniswap, select “Add Liquidity,” and enter the amount of each token you wish to deposit.
- Approve and Deposit: Approve the transaction in your wallet, then confirm the deposit. You will receive LP tokens in return.
- Managing Your Liquidity: Monitor the performance of your liquidity pool and withdraw your tokens when needed. Keep in mind that liquidity provision involves risks such as impermanent loss, where the value of your deposited tokens may change relative to each other.
Participating in Governance
Uniswap’s governance model allows token holders to influence the direction of the platform. Governance is facilitated through the UNI token, which grants voting rights to its holders.
- What is Governance?: Governance in Uniswap involves making decisions about protocol upgrades, fee structures, and other important aspects of the platform. Decisions are made through a decentralized voting process.
- Benefits of Participating in Governance: By participating in governance, you can help shape the future of Uniswap and ensure that it remains user-centric and innovative. Active participants may also receive rewards for their involvement.
- Steps to Participate in Governance:
- Acquire UNI Tokens: To participate in governance, you need UNI tokens. You can earn UNI tokens by providing liquidity, trading on Uniswap, or purchasing them from an exchange.
- Join the Community: Stay informed about governance proposals by joining Uniswap’s community forums, Discord, and following updates on social media.
- Vote on Proposals: When a new proposal is submitted, review the details and cast your vote using your UNI tokens. You can vote directly through the Uniswap interface or delegate your voting power to a trusted community member.
- Submitting Proposals: If you have a significant amount of UNI tokens, you can submit your own proposals for changes to the protocol. Proposals need to meet a certain threshold of support to be considered for a vote.